EN Summary: My next project is Le202b, "Le Perfecto" (sleeveless version) by DP Studio. This is the first article of a series of posts illustrating the making of this project so keep reading the full article on tanysewsandknits.blogspot.com.
---
PT Sumário: O projeto seguinte é o Le202b, "Le Perfecto" (versão sem mangas) de DP Studio. Este é o primeiro artigo de uma série de passo-a-passos ilustrando a confeção desta peça; continuem a ler o artigo completo em tanysewsandknits.blogspot.com.
EN: This pattern is one of the first releases by DP Studio and most online reviews praise the designer allure and style of the finished piece while pointing out some mistakes in the pattern and instructions, so I decided to document most of the sewing process hoping to help those struggling to get a perfectly executed piece.
THE PATTERN: It is described like a revisited biker jacket, maintaining all the signatures of the classical model yet adding a few elements of a more contemporary style: the waistband turning into side tie belts and the two decorative zippers on the right sleeve (version a). Version a is fully lined while version b is proposed as an unlined vest with armhole facing finishing. There are slanted single-welt pockets and shoulder tabs o both versions. Be aware that this model is short, hitting a little below the natural waist level. Regarding the sizing, as far as my experience goes, DP Studio patterns are quite true to size so I cut size 40 according to my full bust measurement and the fit is spot on. The instructions are provided for version a and b in French and English and focused on the French instructions, since DP Studio is a French brand and from my experience, there's always the chance of something getting lost in the translation. I read through both sets of French instructions (version a and b) and in fact detected a few fails. The cutting layout is not accurate (for me these layouts are merely a suggestion, so no problem there; I always figure out the best cutting layout for myself) and there are a couple of omissions and copy/paste mistakes which shouldn't also pose problems for the more experienced hobbyist sewists. For example, instructions for view b (the sleeveless version) include the sewing of the sleeves (??), yet they don't mention the back hem facing anywhere, for example. Instructions for view a (with sleeves) are more complete. Anyway, I decided to make version b but adding a lining so my advise is following the instructions for view a while omitting the sleeves and in the end, just sew the armhole facings to the jacket and lining as one.
---
PT: Este molde foi um dos primeiros lançamentos de DP Studio e a maioria das resenhas online elogiam o estilo e o design de criador desta peça mas ressalvam a existência de erros no molde e nas instruções. Decidi então documentar todo o processo de confeção, sobretudo para ajudar quem tenha dificuldades em coser este molde.
O MOLDE: É descrito como um blusão biker revisitado, mantendo todos os elementos da versão clássica enquanto alguns detalhes adicionais lhe conferem um toque de originalidade e modernidade: o cós que se transforma em tiras de atar de lado e os zípers decorativos numa das mangas (para a versão a). A versão a é forrada, enquanto a versão b nos é proposta como um colete sem forro e com as cavas acabadas com vistas. Em ambas as versões há bolsos inclinados de uma só pestana e presilhas nos ombros. Tomem em consideração que este modelo é curto, não ultrapassando em muito a linha da cintura natural. Quanto ao tamanho, segundo a minha experiência os moldes DP Studio costumam ser consistentes e bem ajustados aos tamanhos reais, por isso cortei o tamanho 40 tomando em consideração a minha medida de peito. As instruções são fornecidas em Francês e Inglês, uma ficha para cada versão a e b. Como DP Studio é uma marca Francesa, olhei para as instruções em Francês, pois há sempre riscos de alguma coisa se perder na tradução. Li ambas as fichas de montagem (para a versão a e b) e de facto encontrei alguns erros e inconsistências; o plano de corte não é preciso (o que para mim não é problema pois estes planos são meramente indicativos e acabo por adaptar o plano de corte por mim mesma), além de ter encontrado algumas omissões e erros de copy/paste nas instruções propriamente ditas. Por exemplo, as instruções da versão b (que não tem mangas) incluem a montagem das mangas e em contrapartida, não falam da vista da bainha das costas em lado nenhum. De qualquer forma, decidi confecionar a versão b (sem mangas) mas com forro, aplicando no final as vistas das cavas ao corpo depois de forrado. Aconselho seguirem as instruções da versão a, omitindo apenas a montagem das mangas e no final aplicarem as vistas às cavas como descrito na versão b.
THE COLLAR: The instructions for sewing the collar are perhaps lacking some details; I've seen a couple of finished versions of this jacket with a poorly sewn collar so I will try to explain how it should be done; firstly we need to understand how the pieces will come together; in the next photo there's the front facing and upper-collar (the front and the under-collar are joined exactly in the same way); I marked the seam allowance width in order to determine the pivot corners (I usually tailor-tack them) and numbered each notch/corner so it is clear how the collar joins the facing:
---
A GOLA: As instruções para confecionar a gola pecam por falta de detalhe; vi algumas versões desta jaqueta com golas muito mal aplicadas, por isso vou tentar explicar como se deve fazer. Antes de mais temos de entender como as peças se juntam, e para isso mostro na foto seguinte a gola superior e a vista da frente (é exatamente o mesmo para a gola inferior e a parte da frente) com o molde marcado com as margens para determinar os cantos importantes (costumo marcar estes cantos com alinhavos). Também numerei os pontos de junção, para que se perceba exatamente como as peças devem ficar unidas no final:
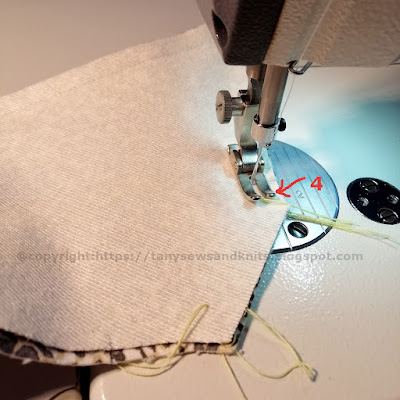
EN: The pattern is well drafted: the upper-collar is cut on the fold and slightly larger to accommodate the turn of the cloth, while the under-collar has a center back seam and is cut on the bias (both upper and under collar pieces are interfaced). After sewing the under collar's center back seam, the collars are stitched together right side facing, STOPPPING at point 4 (tailor-tacked for accuracy) - don't forget to back-stitch:
---
PT: O molde está bem concebido: a gola superior é cortada na dobra do tecido e é ligeiramente maior (para acomodar a dobra do tecido) que a gola inferior, que tem uma costura no meio e é cortada em viés. Ambas as golas devem ser entreteladas. Depois de coser a costura do meio da gola inferior, cosem-se as duas golas direito contra direito PARANDO NO PONTO 4 (marcado com alinhavos para ser mais preciso) - sem esquecer de rematar com pontos atrás:
EN: Don't forget to grade and clip the seams before turning the collar to the right side:
---
PT: Não se esqueçam de escalar as margens e cortar os cantos antes de virar a gola para o direito:
EN: Don't forget to under-stitch the edge of the collar (pressing the seam allowances to the under-collar side and top-stitching 1/16" of the edge seam); this step will prevent the under collar to be visible at the edge:
---
PT: Não se esqueçam também de fazer um pesponto de girar na orla da gola (assentar as margens para o lado da gola inferior e pespontar a 1mm da costura de junção); este passo assegura que a gola inferior não fica visível ao usar a jaqueta:
EN: Here's the finished collar ready to be assembled with the jacket:
---
PT: Aqui têm a gola terminada, pronta para ser montada no corpo da jaqueta:
THE FACINGS: The facings join the lining along curved seams, which are always a challenge for the less experienced. In this case inner back (neckline facing, hem facing and back lining) and inner front units (front edge/hem facing and front lining) are finished separately and then stitched together at shoulders and side seams. I found two minor faults in the patterns: the facings don't match at the shoulders (although the finished back and front units match) and the back hem facing is 3/8" taller then it should be. Let's start with the inner back unit: to stitch the back lining to the back neckline facing, the lining seam should be stay-stitched and clipped as shown next:
---
AS GUARNIÇÕES: As guarnições são cosidas ao forro por vezes com costuras curvas, o que pode ser um desafio para as menos experientes. No caso desta jaqueta, a camada interior é cosida em duas unidades, que no fim se unem uma à outra pelos ombros e costuras laterais. A unidade da frente é composta por uma guarnição da orla com bandas e guarnição da bainha tudo na mesma peça, e pelo forro da frente; a unidade das costas tem uma guarnição no decote e outra na bainha. Ao nível do molde, aqui encontrei duas pequenas falhas: as guarnições não coincidem exatamente nos ombros e a guarnição da bainha das costas é mais larga 1cm do que deveria ser para coincidir com a guarnição da frente. Vamos primeiro ocupar-nos da unidade interior das costas: para coser o forro à guarnição do decote, o forro deve ser pespontado ao longo da linha da costura (1mm dentro da margem) para reforçar e depois as margens devem ser golpeadas:
EN: While the rule of thumb says that when stitching two fabrics of different nature together, the more thick/stable should stay on top, in this case we do the opposite, stitching from the lining side just inside the stay-stitched line. If all has been done correctly, the finished round seam should be flat and without puckers:
---
PT: Embora a regra seja, quando se cosem duas matérias diferentes uma à outra a matérias mais forte/reforçada deve ficar por cima, neste caso faz-se o oposto, cosendo à máquina com o forro para cima, mesmo dentro do pesponto de reforço. Se o processo tiver sido feito com cuidado, a costura curva resultante deve ficar plana e sem franzidos:
EN: The inner front unit is sewn with the front facing on top (according to the rule) and no stay-stitching. The pattern says easing the lining to the facing around the curve but I didn't have to stitch the double row of long loose stitches to do it. I pinned both layers together at the joining notches and while I was stitching with the facing up, I was pulling the lining from underneath so the seam allowances would match as I go. The feed dogs were doing all the necessary easing for me. This is an industrial sewing technique which, if done properly, produces very neat results, as seen below (again, no puckers and a flat seam):
---
PT: A unidade interior da frente é cosida de acordo com a regra (com a vista sobre o forro) e não precisa do pesponto de reforço. No molde indicam embeber o forro ao longo da curva, mas não é necessário fazerem duas linhas de pespontos longos e soltos para o embeber; pode-se usar a técnica industrial. Para isso alfinetei o forro à vista apenas nos nós de aposição (fiz pequenos cortes no tecido e forro, de acordo com as marcas no molde) e ao coser, com a mão por baixo da guarnição, ia puxando o forro para que a sua margem coincidisse com a margem da guarnição. Os dentes de arrasto embebem o forro à medida que se cose e o resultado é muito limpo, se feito corretamente, claro:
EN: To finish the inner back unit there's a hem facing which, in my opinion, should be the same height as the front's facing at the sides:
---
PT: Para completar a unidade interior das costas, há também uma guarnição da bainha, que na minha opinião deve coincidir com a guarnição da bainha da frente na costura lateral:
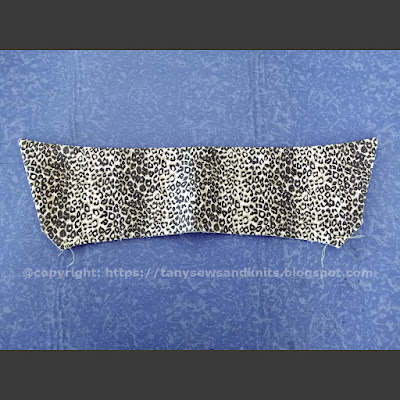
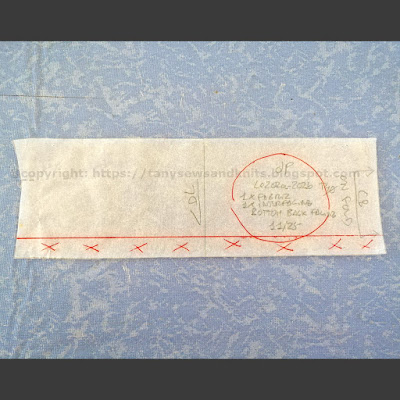
EN: Here's the back hem facing pattern (it's upside down by the way) to be cut on the fold at center back; I had to shave off 3/8" so it would match the front hem facing at the side:
---
PT: Aqui têm o molde da guarnição da bainha das costas (está de cima para baixo, a propósito), para ser cortado na dobra do tecido; tive que diminuir 1cm para que coincidisse com a guarnição da frente na costura lateral:
EN: It's not a severe fault but, together with the absent instructions for sewing this piece on view b, it can be upsetting for some people. Needless to say that if the vest is to remain unlined, it is sufficient to join all facings at side and shoulder seams, thus completing the inner unit without the lining.
In my next article, before I show you the finished garment, I will address the outer shell. The main focus will go to the slant welt pockets, the zipper, the waistband/belt ties, the armhole facings and how to join the whole thing together. Stay tuned!
---
PT: Não é um erro grave, mas juntamente com a omissão das instruções da opção b para coser esta guarnição, pode ser bastante confuso para algumas pessoas. É claro que, se optarem por não forrar o colete, o processo é bastante mais simples: basta unir as guarnições umas às outras na costura dos ombros e laterais para obtermos a camada interior sem forro.
No próximo artigo, e antes de vos mostrar a peça terminada, vou focar-me nos aspetos principais da camada exterior: os bolsos inclinados de uma pestana, a aplicação do fecho, o cós/tiras de atar, as guarnições das cavas e como unir tudo finalmente. Não percam!


3 comments:
hello Tany . looking good . Do you think that the easing in of the lining would work with a walking foot or with duel feed ? I often use a walking foot and it occurred to me that this would eliminate the capacity fro the feed dogs to ease in the lower layer . What sort of machine do you use ?
Hi Mem and thanks! I really don't know about the walking foot but I am guessing it wouldn't work because its purpose is to even out the feed on both upper and under layers of fabic... I use an industrial lockstitch sewing machine. With industrial SMs and techniqies we learn to control the feed just with the way the fabric is hold as it is fed, so I don't feel the need of dual feed devices. Janet Pray has excellent classes on Bluprint (Craftsy) on how to use these techniques even with a domestic sewing machine and it really changed the way I use my sewing machine. In fact it drove me to buying an industrial lockstitch and now I only use my electronic Pfaff to sew buttonholes or lingerie, where the zigzag function is indispensable.
Thank you for this detailed review, as always you do amazing work!! I will be making a VERY similar jacket in the fall, not this pattern, but your tips will be very helpful anyway! Thanks for all you do to help us be better sewers!!
Post a Comment