Corte do forro – Cutting the lining

Português
English (uncheck the other box and check this one)

Normalmente as revistas de moldes não fornecem moldes para o forro das peças. Neste caso específico apenas é fornecido o molde para o forro da parte superior da frente (frente sem encaixe) e para as restantes peças do forro temos que adaptar o molde. A primeira coisa que faço é modificar as bainhas que acrescentei, passando-as de 4cm para 1,5cm. Outro passo importante é descontar a largura das vistas e depois adicionar valores de costura (1,5cm) nas margens de onde retirámos as vistas. Outra alteração normal é cortar o molde das costas na dobra do tecido deixando um excedente para depois construir uma prega no forro. Podem ver na figura seguinte o molde das costas com os valores de costura virados para dentro ao longo do centro das costas; em vez de cortar em toda a volta do molde, deixo a aresta da dobra como está.

No caso deste casaco temos também que acrescentar o encaixe interior do bolso à parte da saia da frente, pois no forro não existe bolso. Para o efeito basta sobrepor a frente ao encaixe, como mostram as figuras:


Esta peça da frente já tem descontada a largura da vista e acrescentados os valores de costura, daí ser mais estreita que a peça que se cortou em tecido.

Nos próximos posts vou mostrar alguns detalhes da construção, em particular como se cose o encaixe da frente e as presilhas dos ombros, uma vez que as instruções são um pouco confusas principalmente para quem não domina bem o Espanhol. Além do mais o desenho técnico do modelo não está correcto quanto às presilhas, o que dificulta ainda mais a interpretação das instruções. Até à próxima!

(NOTA: Esta série de posts foi agendada, e já estava preparada desde o início da semana, uma vez que até à próxima semana estarei demasiado ocupada para escrever nos blogs. Neste momento falta aplicar o forro no casaco para o terminar)


Usually, the pattern magazines don’t include specific pattern pieces for the lining and these pieces must be constructed from the outer shell pattern. In this case the bodice front lining pattern is provided (it’s a whole front without the separate shoulder/armhole yoke piece), but for the remaining lining pattern you must adapt the outer shell pattern. The first step is substituting the hem allowances for the standard seam allowance width. Then, the facing width must be cut off from the pattern pieces, but not all of it: you should add a seam allowance to the edge without the facing. Finally, the back lining piece should be cut roughly 5/8 inches from the fold, to add a wearing ease pleat on the lining center back. Next picture shows the back with the SAs pinned in so you can observe the pleat width on the fold:

Specifically for this coat we have to alter the front skirt pattern because there will be no pockets on the lining. To be able to obtain the lining front skirt pattern, just pin the inner pocket piece to the front skirt pattern, as shown below:


The lining front pattern has the facing width removed and added SAs around the new edge, so it’s narrower than the fabric front skirt piece.

In the next couple of posts I’ll show you some construction details such as how to sew the shoulder/armhole yoke and how to construct the shoulder tabs; the Patrones directions are a little fuzzy on this last matter (the tab design is unusual and I believe the line drawing is inaccurate for the tabs) so I plan to show you how I did my tabs. See you then!

NOTE: This series of posts has been scheduled, and it was written in the beginning of the week; I’ll be too busy to update my blogs until next week. At this point the coat's outer shell is done and next week I plan on sewing the lining and finishing the coat)

Reforços adicionais (Detalhes#2) – Additional Reeinforcements (Details#2)

Português
English (uncheck the other box and check this one)
Normalmente as revistas de moldes trazem instruções muito resumidas de como construir uma peça de roupa, sem entrar em grandes detalhes. É com a prática que se aprende a importância dos reforços, quais as entretelas a utilizar de acordo com o tecido e o efeito mais ou menos estruturado que se pretende, etc. No caso deste modelo da Patrones, as instruções dizem para aplicar entretela numa das partes da gola, no encaixe do ombro e nas vistas, o que na minha opinião é insuficiente. Vou então mostrar o que acrescentei às instruções da revista, além do que mostrei no post anterior (reforço das bainhas e das cabeças das mangas). Este assunto já foi abordado por diversas vezes neste blog, é só procurar em entradas passadas.

1 – Construí um reforço adicional de tecido para as costas; neste caso usei um retalho de algodão e não foi possível cortá-lo na dobra, por isso o reforço terá uma costura no centro como as costas. O molde para este reforço é feito a partir do molde das costas:


2 – Apliquei tiras de entretela termo-colante reforçadas com ponto de corrente para reforço das cavas, decote e abertura dos bolsos (para evitar que deformem com o uso). Comprei as minhas tiras de reforço deste website. São indispensáveis também para reforços em costuras de tecidos de Jersey, por exemplo.

3 – Reforcei a frente, a outra peça da gola e as presilhas dos ombros com entretela de malha fininha, mais ligeira que a entretela usada para as vistas; Na minha opinião, se fizerem casas avivadas é indispensável reforçar também a frente, ou pelo menos o local onde vão abrir as casas (NOTA: Nas fotos a entretela está dobrada no sentido do comprimento, com a cola para dentro).


4 – Para as vistas, uma parte da gola e para o encaixe do ombro usei entretela termo-colante de tecido, um pouco mais forte que a de malha. Além destas peças também usei esta entretela na peça separada do peito/cava, que além da entretela também levou as tiras de reforço nas cavas (na primeira foto a tira ainda não tinha sido colada a ferro; é importante pousar o ferro sobre a tira sem deslizar, ou a tira poderá sair do sítio no processo de colagem):


Além destes reforços vou acrescentar chumaços e cabeças de manga, mas isso mostrarei mais à frente. Até à próxima!

Normally the instructions in most pattern magazines are short and often incomplete, just stating the main construction steps without in depth details. With practice we learn the importance of the inner structure and the reinforcements, and we learn how and when they should apply, depending on the fabric and final effect desired. The directions for this particular Patrones pattern mention applying fusible interfacing to one of the collar pieces, the shoulder piece and the facings. Adding to what I stated on the previous post (hem and sleeve cap reinforcements), here’s what I decided to add in terms of interfacings:

1 – Constructed a back shield made of cotton fabric; in this case I couldn’t cut the shield on the fold so it will have a back seam as the back pattern has. The pattern for the reinforcement is built from the back pattern:


2 – Fused chain stitch reinforced tape to the armholes, neckline and pocket openings (to avoid sagging of the pockets). I ordered my fusible tape from this website. They are also indispensable to reinforce some seams on jersey fabrics.

3 – Fused thin knit interfacing to the bodice front, one of the collar pieces and the shoulder tabs. In my opinion the fronts should have some kind of reinforcement if making bound buttonholes; we should either reinforce the entire front or the buttonhole area alone.


4 – For the facings and inner collar piece I used thin woven fusible, which adds a little more body; I also used this interfacing on the front shoulder/armhole piece; besides the interfacing, the armhole also took fusible tape (on the first picture the tape is not fused yet; don’t forget that the iron shouldn’t slide when fusing, it’s a press and lift movement, or the tape might get out of place):


I will also add sleeve heads and shoulder pads, but that will be explained on a later post. All these matters were previously addressed on this blog and you’ll find a lot of additional info if you browse through my old posts. See you later!

Trabalho de preparação (detalhes #01) - Prep work (Details #01)

Português
English (uncheck the other box and check this one)
Têm aqui alguns detalhes da preparação das peças antes de começar a coser:

Colocação da entretela de reforço nas bainhas (mangas e peças da saia do casaco) – usei tiras de entretela cortada em viés com 6cm de largura (Aqui ainda não estão coladas a ferro):

Marcação das pinças com alinhavos (partes superiores e inferiores do corpo do casaco):


Traçado do molde para o reforço (entretela) da cabeça da manga (peça superior da manga):

Preparação do molde para depois cortar o forro; em todas as bainhas de 4cm, passar para 1,5cm (Partes da saia do casaco e ambas as partes das mangas):

Here are some details of the prep work preceding the actual stitching process:

Hem reinforcements (sleeve pieces and lower body); used bias cut interfacing 4/5 inch wider than the hem allowances (it’s not fused yet).

Thread tracing of the darts (upper bodice and lower body pieces of the coat):


Tracing the paper pattern for the sleeve cap interfacing reinforcement (upper sleeve):

Preparing the paper pattern for cutting the lining: reduce all hem allowances to 5/8 inch (sleeve pieces and coat lower body).

Traçar moldes com margens de costura incluídos - Tracing patterns adding seam allowances

Português
English (uncheck the other box and check this one)
É algo que se pode fazer quando se tem confiança que o molde assenta bem ou quando o molde é tão simples que não será necessário ajustá-lo. Depois de copiar o molde em papel vegetal basta acrescentar as margens necessárias (eu costumo acrescentar 4cm nas bainhas e 1,5cm nas restantes margens). Para desenhar as margens de 1,5cm podem usar um compasso regulado com a medida correspondente, passando-o ao longo das linhas do molde de forma que a parte do lápis desenha um a orla em redor do molde.


Para cortar estou a usar uma lâmina rotativa e uma base de corte especial, que não estraga a lâmina nem fica cortada. Este equipamento não é barato mas justifica-se se costurarem bastante, pois evita lesões nas articulações provocadas pela utilização continuada da tesoura. As peças do molde são colocadas sobre o tecido dobrado ao meio no sentido do comprimento e podem segurar-se com pequenos pesos ou alfinetes, como fiz aqui. Se usarem alfinetes, tenham cuidado pois podem distorcer o tecido. É melhor fixarem primeiro um alfinete em cada topo da peça e seguidamente um em cada extremo lateral, e só depois preencher as orlas com alfinetes suficientes (espaçados cerca de 10-15cm).

Não se esqueçam de guardar alguns retalhos que sobram do corte, pois são necessários para testar os pontos da máquina de coser, as entretelas, e para fazer as casas avivadas.

Em seguida vou colar as entretelas e reforços (fazendo alguns testes nos retalhos primeiro), marcar as linhas relevantes com alinhavos (pinças, linhas de sobreposição, etc.), preparar o molde para cortar o forro e cortar o forro. Em relação ao forro fiz um teste com o cetim estampado e parece-me que o pique branco deixa transparecer o motivo estampado para fora… Vou ter de alterar os meus planos mais uma vez. Até à próxima!

This is something that you can do if you have confidence in the pattern used (and the pattern doesn’t include SAs, like BurdaStyle or Patrones patterns) or when the pattern is so simple and or loose fitting that we can assume that it won’t need tweaking to fit properly. After tracing the pattern on paper, just add the necessary seam allowances and hem allowances. You can use a compass to trace the outlines, it’s pretty easy and it saves some time.


I’m using a rotary cutter and a self-healing mat, which are good investments if you sew a lot. I don’t use this method for every fabric but it’s perfect for the cotton pique. The rotary cutter also prevents joint lesions caused by the repetitive usage of scissors. The patterns can be hold in place by some weights or they can be pinned; this last case requires some practice avoiding fabric distortion; first set the upper and lower extremes of the pattern and then both sides, using one pin for each end; then pin around the piece, more or less 4 inches apart. If the extremes are secured first, with the fabric and pattern flat, the distortion will be minimized when pinning around the paper pattern.

Don’t forget to save some scraps because you’ll need them for testing the machine stitches, the interfacings and for making the bound buttonholes.

OK, the fabric is cut and next I will cut and fuse the interfacings and reinforcements (testing on scraps first), thread trace the relevant markings (notches, darts, etc.), prepare the pattern for cutting the lining and cut the lining. Speaking of the lining, I tested the printed fabric against the white pique and there seems to be some see through. I might have to change my plan once again… See you next time!

Notícias excitantes - Exciting news

Português
English (uncheck the other box and check this one)
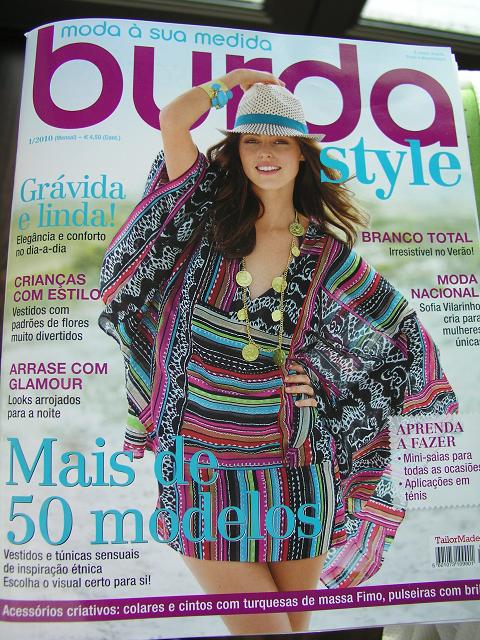
Já todas(os) devem saber que este mês saiu a Burda Style editada em Português… É uma iniciativa que saúdo e acarinho pois tenho a certeza que contribuirá para que o hobby de costurar seja mais facilmente difundido e aperfeiçoado pela comunidade de expressão Portuguesa em todo o mundo!

A editora da Burda contactou-me com um pedido muito especial antes do lançamento; pediram-me que escrevesse um pouco sobre a minha história e o papel da Burda na minha contínua aprendizagem desta arte. Nesta primeira edição da Burda Style em Português podem encontrar um artigo que escrevi a contar a história de como tudo começou para mim e como a Burda esteve lá no início e ao longo do meu percurso:

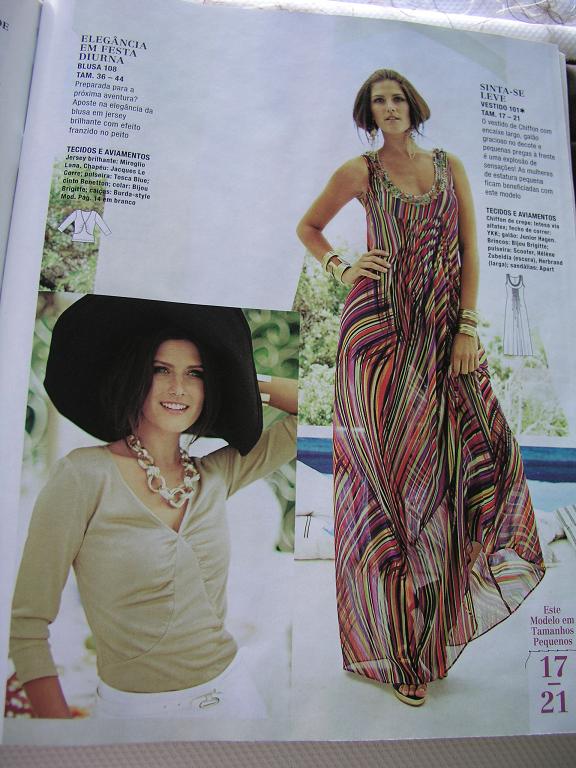
Este número traz modelos muito bonitos, dos quais mostro alguns exemplos:

Espero fazer o colete em breve e também gostei muito das calças, aliás acho que fato completo está o máximo.

Outro modelo que me chamou à atenção foi estes calções, que poderiam ser confeccionados em napa ou cabedal fino (um estilo presente em alguns dos desfiles actuais).


E não podiam faltar os maxi-vestidos flutuantes e românticos, outra tendência desta primavera/verão!

Quanto às minhas actividades de costura correntes, estou um pouco parada por motivos diversos; decidi mudar o tecido do projecto em curso e depois de ter pensado em várias alternativas decidi-me por um piquê branco e cetim estampado para o forro… Já tenho o molde traçado e falta-me apenas tempo para por mãos à obra!

Desejos a todos de uma óptima semana de costura!

You must already know that this month the Portuguese Burda Style was released… I salute and cherish this initiative because I think that it will enable the Portuguese speaking community all over the world to get access to a multitude of sewing info in their native speaking language, thus spreading the scope of the sewing art knowledge.

The editors of the Portuguese Burda Style contacted me a few months ago asking for my collaboration, in terms of an article stating my early sewing path and how Burda played (and still plays) an important role in my sewing education. Here’s the article (sorry, no English translation at this point; basically I explain how a neighbor dressmaker aided me along my first steps operating a sewing machine and how her work and extensive Burda collection inspired me to start sewing my clothes):

This issue features a lot of interesting patterns, here’re a few examples:

I plan on making this vest soon, using some printed sequined fabric from my stash. In fact I love the entire outfit and might make the trousers too.

Another model that caught my eye was these shorts; they can be made up of leather or leather-like fabric, for achieving a very trendy piece (leather shorts are a strong trend for spring this year).


And, of course, there are also flowy and romantic maxi-dresses!

As for my current sewing activities, I went through some lack of sewing mojo (and lack of time too) but I plan on being back on the saddle soon. There was a change of plans concerning my current project: I decided to use another fabric for the coat and the lining and after debating a little on what fabric to use, I ended up choosing this white cotton pique and the printed satin for the lining. Now all I need is some time to get the coat done!

Wishing you all a wonderful sewing week!