2012#2 – Baby sailor coat – Casaco de bebé marinheiro

Português
English (uncheck the other box and check this one)
Um casaquinho comprido de bebé, todo tricotado em ponto mousse (jarreteira), com trespasse na frente e capucho. O modelo original foi publicado na revista Phildar 768 (edição Francesa), modelo 15:
(Foto: reprodução)

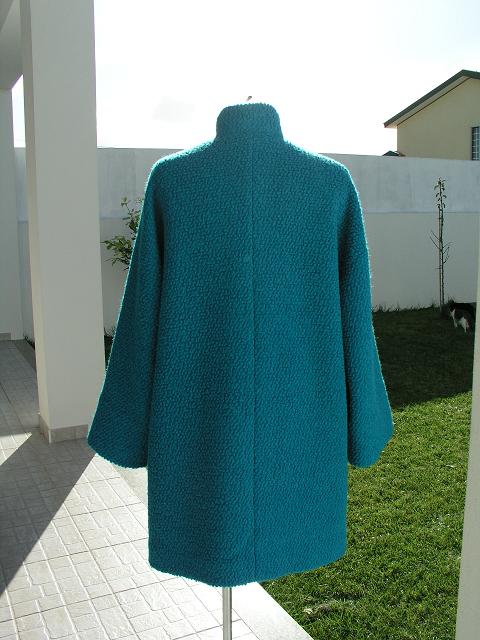
Para lhe dar um pouco de graça escolhi uns botões estilo marinheiro e um emblema da Guarda Costeira!
Foi todo trabalhado com agulhas de 4,5mm e lã Rosarios4 Bambino em branco. Gastei cerca de 3 novelos de 100g.

PS – Como algumas amigas aconselharam, vou remover as etiquetas dos casaquinhos (já as tinha retirado de toda a roupa interior e baby-grows que comprei). Pensei que por serem roupas de usar por cima de outras não houvesse problema, mas mais vale prevenir, certo?

Obrigada a todas pelos comentários e pela força! Beijinhos e fiquem bem!

This baby coat is knitted in garter stitch and has a cross over front and a hood. The original model was published in Phildar 768 magazine (French edition), model 15:
(Photo: reproduction)

I customized it with sailor buttons and a coastguard embroidered appliqué:
This coat was entirely knitted in garter stitch using US 7 needles (4,5mm) and a Portuguese brand of yarn, Rosarios4 Bambino; I used three 3.5 oz skeins for this baby coat.

PS – Some of my friends/readers mentioned that I should remove the label from the orange coat. I’ll remove my labels from the baby coats that I’ve made (I’ve done that already for all the baby underwear and other clothes that I’ve bought, but since the knitted jackets/coats are outwear I thought it would be ok to keep the labels on. However, I better be safe than sorry and I’ll remove all the labels).

Thank you all for the well wishes and the cheering!

2012#1: The tangerine baby jacket (knitting) – Casaquinho de bebé tangerine (tricô)

Português

English (uncheck the other box and check this one)

Olá amigas e amigos, há muito que não vos escrevia… Como alguns de vocês já sabem, a ausência deve-se ao facto de estar grávida (ver artigo no meu outro blogue aqui) e em consequência ter perdido a vontade de costurar e também em parte a disposição para passar longas horas a escrever artigos e comentários. Sempre que posso continuo a visitar os meus blogues favoritos, mas tenho-me abstido de comentar, pois não sinto disposição para passar tanto tempo na Internet. Não posso no entanto evitar sentir-me em dívida para com os meus leitores e hoje decidi passar aqui para dizer que está tudo bem, que para já a minha gravidez está a decorrer sem qualquer problema e que estou a gostar muito deste “estado interessante”, como lhe chamava a minha falecida avó paterna. Os únicos lavores que tenho feito (e só me começou a dar vontade recentemente!) foram tricô para o bebé, que aproveito para dizer que é um menino cujo nome ainda não está 100% decidido, por isso vou-me abster de divulgar aqui.

Passo agora a mostrar o primeiro projecto de tricô que fiz, o casaquinho tangerina:
O modelo está disponível online em Português no website da Drops (clicar aqui).

Utilizei um fio de algodão da Rosários (não tenho aqui a referência, depois edito se encontrar) e agulhas de 5mm. O modelo é muito fácil todo tricotado atravessado em ponto mousse (também chamado jarreteira). Escolhi uns botões de madeira em forma de ursinho para lhe dar mais piada e como é uma peça para usar sobre a roupinha, cosi-lhe a minha etiqueta por dentro (uma vez que não estará em contacto com a pele do bebé, não se corre o risco de a irritar).

Tenho mais projectos concluídos que vou tentar ir mostrando se tiver disponibilidade, pois sei que algumas das minhas leitoras estarão interessadas neste tema das roupinhas para bebé! Entretanto, para quem ainda não viu, visitem o meu outro blogue onde publiquei fotos de algumas ofertas em tricô que recebi. Também encontrarão lá um “temporizador de gravidez” por baixo do cabeçalho do blogue! Mais tarde também penso publicar algumas fotos do quarto do bebé, logo que o consiga ter arranjado (ainda vai demorar algum tempo, estamos à espera da mobília!).

Beijinhos a todos e obrigada por me visitarem!


Hello dear readers and friends, it has been a long time since my last post… As some of you already know, my absence is due to the fact that I’m pregnant (click here for an update on my other blog) and since I got pregnant I absolutely lost by sewing mojo, along with my drive to blog and spend as much time in the Internet as I used to. I still try to visit my favorite blogs from time to time but usually I don’t comment because my time is so short. However I can’t avoid feeling a bit guilty and in debt towards my readers and friends and today I decided to drop by and say that all is well, so far my pregnancy time has been wonderful and free of problems and most annoying side effects except for the occasional back pain (I feel lucky so far!). I wouldn’t say my growing belly is an annoying side effect because I love it! The only crafting activity has been very recent and for now is limited to knitting a few clothes for my baby boy, whose name negotiations are not full closed yet.

Let’s move on to showing the first of my baby knitting projects, the tangerine jacket:
The instructions are available online over at the Drops Website (click here for the US version, click here for the UK version and click here for the French version – you may look it up in other languages too).

I used a Portuguese brand of cotton yarn and US size 8 needles (5mm). This is a very easy project, all knitted sideways in garter stitch. I picked up these wooden teddy bear shaped buttons because I think they make the jacket a lot more interesting. I also sew in my label; since this in an outwear piece, I don’t think there’s a chance of it irritating the baby’s sensible skin.

I have a couple more finished projects to show and another one on the making. I will try to post them all here as soon as I get some free time because I know some of you will be interested to follow this subject. On my other blog I published some pictures of handmade gifts that we’ve got (click here) and there’s also a “baby ticker” right bellow the blog header (for some reason I failed to alter the blog layout of Couture et Tricot which has an older template). Over at my other blog I plan on posting some nursery pictures too as soon as the nursery is ready (it will still be a while though).

BIG HUGS to all and thank you for visiting!

2011#35 – Houston, we have a knit project!

Português
English (uncheck the other box and check this one)
Pois é, apesar da dormência que por vezes sinto nas mãos, ainda vai dando para tricotar qualquer coisinha… Este “snood” (“snood” significa cachecol tubular) foi iniciado no inverno passado e posto de lado porque o tempo entretanto começou a aquecer. Este ano retomei o projecto e terminei-o há cerca de um mês. Trata-se de um rectângulo em liga com as dimensões aproximadas de 50x100 cm onde no final se une o final do trabalho com a volta inicial ao rematar. Neste caso também adicionei uma corrente de croché numa das extremidades do tubo resultante, para poder aconchegar melhor ao pescoço. Usei agulhas de 10mm e fio acrílico (3 fios juntos) para obter este efeito bem volumoso. Podem ver mais fotos minhas a usá-lo aqui. Fiquem bem!


In spite of the numbness that I sometimes feel on my hands and arms I’m still able to do some knitting. This snood was started last winter and put aside because the winter was over before I could finish it. This year I resumed the project and was able to finish it about one month ago. It's basically a 40x20 inch rectangle knitted in garter stitch with the two shorter ends joined together. I also threaded a chain cord along one of the ends of the resulting tube, to be able to snug it around my neck. I used US15 (10mm) needles and three strands of yarn (100% acrylic) to obtain this chunky effect. You can see photos of me wearing it here. Thanks for visiting!

2011#37 – “Abrigo T” (pattern by Paco Peralta)

Português
English (uncheck the other box and check this one)

(mais fotos de mim a usar o casaco aqui)

Descrição: Casaco amplo em forma de “T”. Este modelo tem um encaixe na frente e uma gola “em pé” com casa de botão na costura. Os ombros são caídos e as mangas largas têm duas opções: compridas ou a ¾ com uma dobra (no molde da manga estão marcadas as linhas de corte para as duas opções, assim como as diferentes linhas de corte para o forro da manga). Tem bolsos metidos na costura lateral e é completamente forrado.

Molde: Original Alta-Costura de Paco Peralta (disponível para compra aqui). O molde está escalado em 3 tamanhos (P, M e L – ver especificações na página ETSY do molde), eu cortei o M. É fornecido numa folha contínua de papel vegetal e contém já margens de costura (1,5cm) e bainhas (5cm), pronto a cortar e a colocar sobre o tecido. Também são fornecidos moldes para cortar o forro do casaco.
Tecido usado: Misto de lã e poliéster, efeito “lã feltrada”, comprado na Feira dos Tecidos a 19,95€/m. Usei 2,15m de tecido, com alguma “ginástica” no plano de corte. Quanto ao forro, leva praticamente a mesma metragem.

Mais fotos do casaco:
Confecção: Este casaco é relativamente fácil de confeccionar (o molde não vem com instruções) e o Paco publicou já alguns passo-a-passos muito úteis:


Artigo sobre a confecção industrial (para verem como se aplica o forro ao casaco, obtendo um acabamento industrial): http://uniquedesignerpatterns.blogspot.com/2008/01/chaqueta-confeccin-industrial.html

Aqui vou listar os principais passos na ordem como os segui e também mostrar o processo de aplicação da gola em pé ao casaco:

1º Apliquei entretela termo-colante suave na gola, nas frentes (ao longo do meio da frente e também na vista incorporada, nas bainhas do casaco e das mangas. Apliquei também tiras de entretela para reforçar a entrada dos bolsos.
2º - Cosi o encaixe da frente às partes de baixo da frente, deixando a abertura para a casa de botão na frente direita e na respectiva vista incorporada
3º - Cosi a costura do meio das costas
4º - Cosi as costuras dos ombros
5º - Cosi as mangas abertas na costura das cavas
6º - Reforcei todo o decote com um pesponto
7º - Cosi as costuras laterais do casaco (deixando as aberturas para os bolsos) e, em continuação, as costuras das mangas
8º - Confeccionei os bolsos metidos na costura
9º - Cosi o encaixe da frente em forro às partes inferiores da frente
10º - Cosi as partes da frente em forro às vistas da frente
11º - Cosi a costura do meio de trás do forro, deixando uma prega como indicado no molde; reforcei o decote com um pesponto
12º – Cosi a costura dos ombros das costas em forro aos ombros da frente+ vistas, obtendo uma abertura circular, onde se aplicará a gola em pé:
13º – Cosi e virei a gola, golpeando nos cantos:
14º - Inseri a gola na abertura, golpeando ao longo dos valores de costura da abertura, reforçados com um pesponto:
15º - Depois de coser a toda a volta (não esquecer de deixar as aberturas para a casa de botão aqui também), dei uns piques nos valores de costura da gola, abri as costuras a ferro evirei tudo para o direito. Cosi as costuras sobrepostas com pontos atrás mesmo na linha da costura e assentei tudo a ferro:
16º - Prossegui com a confecção do forro, cosendo as mangas às cavas e depois fechando a costura lateral e a das mangas na continuação. Deixei uma abertura no forro numa das mangas, para poder virar o casaco depois de aplicar o forro pelo método industrial
17º - Apliquei o forro pelo método industrial, virei o casaco para o direito, alinhavei todas as bainhas no lugar, alinhavei também as vistas da frente à frente na sua posição definitiva, virei de novo para o avesso, cosi as bainhas à mão, cosi as vistas à frente do casaco, tudo no avesso. Depois foi só virar o casaco para o direito pela abertura no forro e fechar a abertura com pontos à mão.
18º - Dei uns pontos invisíveis à mão nas casas de botão e apliquei os botões; depois de uma última passagem a ferro ao casaco e ao forro, o trabalho está concluído!

Modificações ao molde: As mangas na opção A são bastante compridas; acabei por fazê-las mais curtas 6cm, obtendo assim umas bainhas mais largas que permitem usar as mangas com punhos virados, como mostro a seguir:
Mais detalhes:

Os botões são muito giros na minha opinião:
Os bolsos metidos nas costuras:
Eis o forro:
Os cantos em baixo, confeccionados pelo método industrial explicado pelo Paco:
A etiqueta do criador (fornecida junto com o molde) e a minha etiqueta:
Conclusão: Um excelente molde, como aliás o Paco nos tem habituado e para casaco é dos mais fáceis de confeccionar, uma vez que o molde é simples (a gola é bastante fácil, os bolsos idem, e não tem detalhes muito difíceis). Gosto do estilo minimalista e recto, das linhas puras que ao mesmo tempo respeitam a anatomia do corpo e creio que o resultado final foi bem conseguido. Como sempre, podem ver-me a usar este casaco aqui. Beijinhos, obrigada por visitarem e tenham um óptimo fim-de-semana!


(More pictures of me wearing this coat are published here)

Description: Lined T-shaped straight-cut coat, has a front yoke, stand-up collar, in-seam buttonholes and in-seam side pockets. It features dropped shoulder and two options for the sleeves: long or ¾ with turn-ups (there are cutting lines for both options on the pattern, and for the lining as well)

Pattern: Haute-Couture Original by Paco Peralta (available for sale here). The pattern comes graded in three sizes (S, M and L – specifics on the patterns webpage) and I cut the M. It’s drafted by hand on a continuous pattern paper and includes 5/8 seam allowances and 2” hem allowances, ready to be cut and placed on the fabric. The lining pattern is also included.

Fabric: Wool/polyester blend, sort of boiled wool finished, bought locally. I used 2.5 yards of fabric and roughly the same in lining (buy extra fabric, to be safe).

A couple more pictures of the finished coat:

Construction: This is an easy project (I mean for a coat; it’s important to know that this pattern doesn’t include instructions or cutting layouts) and Paco already published some useful tutorials that provide good insight on how to make this coat:


In the present article I will describe the main steps and construction order that I used, showing in more detail the making of the stand-up collar:

1º Apply interfacings (I used soft fusible interfacing, similar to pro-weft interfacing): collar, facings, along center front (roughly facing wide), hem allowances (5 inches wide) and pocket openings.
2º - Stitch the front yoke/facing to the bottom front/facing, leaving openings for the buttonhole on both right front and facing
3º - Stitch the center back seam
4º - Stitch the shoulder seams
5º - Stitch the sleeve pieces to the armholes
6º - Reinforce the neckline stitching near the seam line (you can also reinforce the neckline with fusing tape or a strip of lining selvage; I didn’t because the collar piece is cut on the grain and it is stable enough)
7º - Stitch the side seams (leaving the pocket openings unstitched) and the sleeves seams in a continuous step
8º - Construct the in-seam pockets
9º - Stitch the lining front yoke to the bottom front
10º - Stitch the lining fronts to the front facings
11º - Stitch the lining back seam leaving a fold for ease of movement, as indicated in the pattern
12º –Stitch the lining back to the lining front/facing along the shoulders, obtaining a circular opening, where the collar will be later inserted:

13º – Stitch the collar (folded in half, stitch along the narrow edges not crossing the seam allowance in the collar line, then clip corners and turn to right side)
14º - Insert the collar in the neckline opening, clipping around the reinforced neckline edge;
15º - Stitch all around the collar/neckline (don’t forget to leave the in-seam buttonhole openings where marked on the right front and facing), notch the collar SAs and press the seams open. Turn everything to the right side and backstitch on the ditch around the neckline, making sure the seams match on the right side and lining side. Press one last time
16º - Proceed with the lining construction, stitching the lining sleeves to the lining armholes and then the lining side seams/sleeve seams, all in a continuous step. I left an opening in one of the sleeve seams to be able to turn the coat/lining to the right side once the lining is bagged
17º - I bagged the lining using the industrial method explained by Paco. Turned the coat/lining to the right side and basted the front facings in place, and all the hems; turned the coat/lining to the wrong side again and hand-tacked the hems and the front facing to the front. Turned the coat/lining to the right side, closed the lining opening and removed the bastings
18º - Slipstitched the buttonholes by hand and stitched in the buttons; after one last pressing the coat is finished!

Alterations: The only alteration was shortening the sleeves by a little more than 2”, and because of this I got a wider hem allowance. This way I can also do turn-ups if desired:
More details:

I really love the buttons:
The in-seam pockets:
Here’s the lining:
The facing/hem/lining corner obtained by the industrial bagging method explained by Paco:
The designer’s label (there’s one included with each of Paco’s patterns), along with mine:
Conclusion: This pattern is rated excellent by my book, nothing less should be expected from Paco; everything is carefully marked and labeled, all pattern pieces match perfectly. This coat is fairly easy to make (the collar is very easy, the in-seam pockets are quite straight forward as well; there aren’t any real challenging details). I like the clean straight lines, the minimalistic style yet respecting the body’s anatomical characteristics, and I believe the end result is quite outstanding. As usual, there are more pictures of me wearing this coat here. Have a great weekend and thank you for visiting!