
EN Summary: My next coat is the lovely Marfy2268 made up from billiard green loden fabric. In this article I'm addressing the fabrics used, I'm sharing my thoughts about Marfy patterns and this particular pattern and I'm also discussing the inner structure (methods and materials) that I plan on using. Keep reading for more!
---
PT Sumário: O meu próximo casaco será confecionado com este adorável molde Marfy2268 que será confecionado de lã grossa pisoada verde-bilhar. Neste artigo vou falar dos tecidos que vou usar, vou falar dos moldes Marfy e deste em particular, para quem não conhece e também vou começar a delinear o plano para os reforços interiores que darão estrutura ao casaco. Continuem a ler para saberem tudo!
EN: Let's talk about the fabrics because it all started last year with me being obsessed with this particular shade of green and ordering this fabric online from the Portuguese web equivalent of MyFabrics.co.uk (here). I only started to realize how thick this 100% wool fabric really is when I started to manipulate it and testing it for suitable interfacings. When I finally picked a pattern for this coat I also needed lining and I found the perfect color match at the same online shop (here): the Neva'viscon elasticated lining material, 57%Viscose, 40% Polyamide and 3%Spandex. This material is well worth its price IMO, and I highly recommend it for lining
---
PT: Deixem-me primeiro falar do tecido, que foi por onde tuo começou há cerca de um ano atrás; andava eu obsecada por este tom de verde em particular e encomendei este tecido de tecidos.com.pt (aqui). Só me apercebi realmente de quão grosso é este tecido quando o comecei a manipular e a testá-lo com entretelas. Quando recentemente me decidi quanto ao molde a usar, verifiquei que também ia precisar de forro e na mesma loja online encontrei a cor exata num forro excelente, o Neva'viscon com alguma elasticidade (aqui). Este forro de composição 57%Viscose, 40%Poliamida e 3%Elastano vale bem o preço que custa e recomendo-o para projetos de confeção mais elaborados.

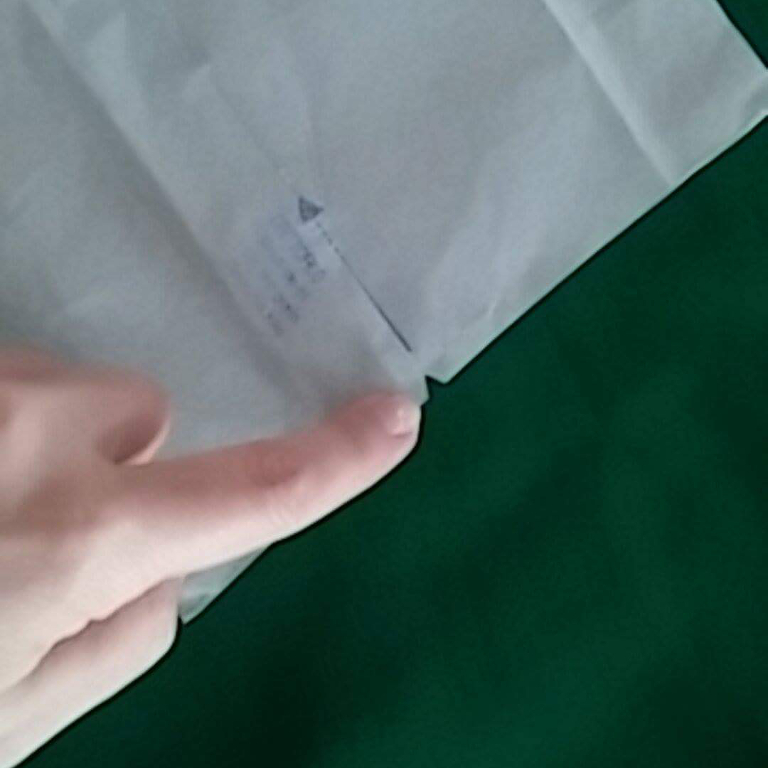
EN: To avoid adding the extra bulk along the fronts and collar (even more because this coat has double-breasted fronts), I purchased a thinner fabric (it's a poly blend) for the facings and inner collar. I used this same technique on the Blue Orchid jacket (click here and scroll down for the review in English), and it worked very well with the blue wool used, which is very similar to the green fabric. I was lucky to have found a very close color match:
---
PT: Para evitar o volume extra na frente do casaco (ainda mais porque a frente é de trespasse), comprei um tecido mais fino (sarja de poliéster) para as vistas e parte interior da gola. Usei esta mesma técnica na jaqueta Orquídea Azul (clicar aqui), que é feita de um tecido muito semelhante, e resultou lindamente. Uma vez mais tive sorte em encontrar o tecido numa cor muito aproximada à da lã pisoada:

The Marfy patterns in general: Marfy patterns come as a single size traced and pre-cut into pattern tracing pattern; they don't include seam or hem allowances; they don't include any type of instructions; they also don't include the pattern for the lining, so you'll have to draft your own if the garment needs one. The pattern pieces come with little "V" shaped notches and from my experience these are very accurately placed. Some of the notches have stamped letters to indicate the matching notch on other pattern piece(s); other notches have a stamped arrow and this means there is another notch across the pattern with the same arrow (connecting these two notches will indicate the straight of grain line very accurately). The ease notches don't have any indication, it is assumed that you know your way with sewing patterns to be able to identify which is what. Other than that, there are minimal markings, usually stamps, indicating for example the center back seam, or the center front line. The buttonhole/button placement is also marked with stamps and it is not accurately marked (in this coat they were not evenly spaced, for example); the stamping is there just to provide a visual aid.
---
Os moldes Marfy em geral, para quem não conhece: estes moldes vêm num envelope já cortados em papel de moldes num só tamanho específico e não incluem quaisquer margens de costura ou bainhas; também não têm nenhum tipo de anexo com instruções. Molde para o forro não é incluído, por isso se a peça necessitar de forro têm que o traçar a partir das peças base. As marcas de aposição são pequenos piques em "V" e da minha experiência posso dizer que estão marcados com bastante precisão. Alguns destes piques têm uma letra carimbada, para identificar o pique coincidente noutra(s) peça(s) do molde; outros têm um carimbo de uma seta, e isso significa que no outro extremo do molde encontram outro pique com o mesmo carimbo. Unindo estes piques obtêm-se a linha do correr do fio. Outros piques não têm qualquer indicação (por exemplo os de embeber), pois assume-se que quem utiliza estes moldes percebe do assunto o suficiente para saber identificar o que é o quê. As indicações no molde são mínimas, geralmente carimbos designando a peça específica (frente do meio, costas, painel lateral, etc.), ou a costura do meio das costas, por exemplo. As casas e posicionamento de botões também são marcados com carimbos mas sua posição não é precisa, é apenas uma ajuda visual para entender o molde (os botões podem não estar igualmente espaçados, por exemplo).
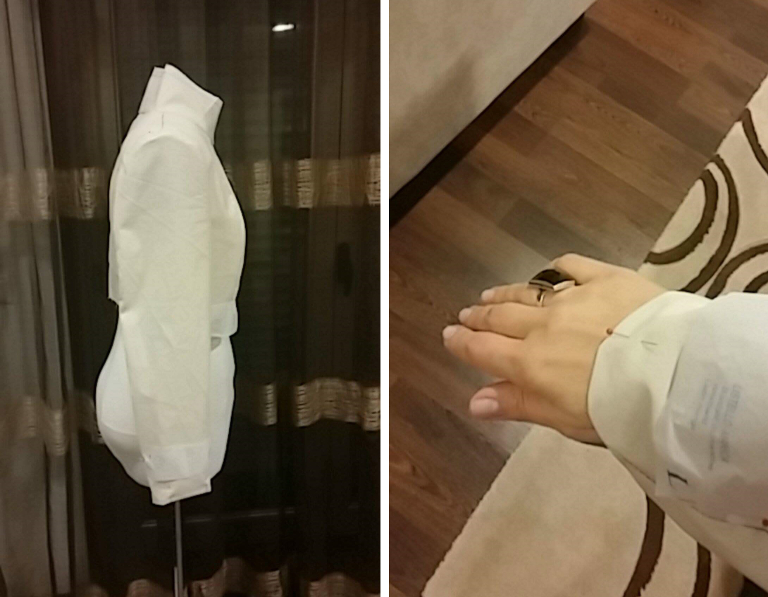
The Marfy 2268: It is described as: "Jacket has a double crossover with cowl collar, raised waistline marked with inserted flaps. Can also be made as mini-coat". I believe the collar is a wide stand-up collar, something must have been lost in the translation. On the website (click here) there's also indication of the yardage (I am pretty sure it is for the jacket version - the shorter) but nothing is said about other materials/notions, like buttons or lining; you have to figure it out just by observing the illustrations provided. Although the illustrations show a shorter version (jacket) and a longer (mini-coat), the pattern is single length (I assumed it's the jacket length because it hits right bellow the hip line). I wanted this to be a coat so I lengthened the bottom pattern pieces by a little more than 5 inches. The two-piece sleeves are very well drafted and the upper sleeve must be eased into the under sleeve along the sleeve back seam (there are a couple of notches on the upper sleeve indicating the eased portion, and these match another couple on the under sleeve that are placed slightly less apart). I made a partial toile for this coat because I wanted to check its fit and proportions, and also the sleeve length and hang. Here's the toile, missing the skirt part at this stage; I've only sewn one of the sleeves; I am fairly symmetrical and muslin fabric is surprisingly hard find where I live. If you observe carefully, the flaps and tabs are the paper pattern pinned in place, just to check if their marked position works for me:
---
O molde Marfy 2268: É descrito como "jaqueta com trespasse, gola "xaile" - aqui acredito que houve um erro na tradução - e cintura subida com paletas. Também se pode fazer como casaco curto". A gola obviamente é uma gola em pé ampla. No site da Marfy (clicar aqui) têm a indicação da metragem de tecido necessária, mas é minha convicção que se referem à jaqueta e não à versão casaco. Nada é dito a respeito de outros materiais necessários, como forro e botões por exemplo, e temos de adivinhar ao observar as ilustrações do modelo. Embora o modelo seja apresentado em dois comprimentos, o molde é cortado com um comprimento, que creio ser o da jaqueta (fica ligeiramente abaixo da anca); como estava interessada na versão casaco, aumentei a "saia" 13cm. As mangas de duas peças estão muito bem desenhadas e a parte superior tem folga para embeber na inferior, um detalhe muito refinado que acentua a curva da manga no cotovelo. O molde superior tem dois piques ligeiramente mais afastados que os correspondenets piques do molde inferior da manga, daí o excesso tem de ser embebido entre os dois piques. Fiz um modelo de prova parcial para este casaco porque queria verificar as proporções e as linhas do modelo, além do comprimento e cair das mangas. Aqui o têm, ainda sem a saia e apenas com uma manga (basta uma porque sou praticamente simétrica e o pano crú usado para estas provas é dificil de encontrar à venda onde resido, tenho que encomendar de fora). Se atentarem na foto, podem ver que as paletas e as presilhas das mangas são o molde em papel, preso com alfinetes sobre os piques que indicam onde posicionar estas peças.

EN: I was surprised to see that the sleeve pattern has additional ease on the bottom part of the armhole: If all the notches are aligned, there's definitely some extra there, besides the ease on the sleeve cap. I stitched in the sleeve easing this small portion under the arm and it worked fine! The sleeve hangs beautifully without excessive ease on the top. As one of my followers commented on my IG feed, this is an old tailor's trick as it gives extra fullness without getting a puffed sleeve cap. I don't remember seeing this on a contemporary pattern but it seems Marfy's patternmaking system takes this detail into consideration, refining the fit of their sleeves. This was eye opening to me, and proof that sewing is a never ending learning journey!
---
PT: Fiquei muito surpeendida quando ao coser a manga no modelo de prova, verifiquei que, para alinhar todos os piques, a parte debaixo da manga também teria de ser embebida (além da cabeça da manga). Apliquei a manga com este ligeiro embebido e os resultados foram estupendos! a manga cai muito bem e não tem excesso de tecido na cabeça das mangas. como muitas que se vêm por aí. Uma seguidora no meu IG comentou que este é um velho truque de alfaiate para dar amplidão à manga sem adicioanr demasiado no embebido da cabeça da manga (evitando aquele efeito "franzido" em cima). Ao acrescentar aplitude também por baixo, cria espaço para um bícep mais largo mantendo a cabeça da manga elegante. Parece que o sistema de patronagem Marfy leva este detalhe em consideração e isto prova a minha premissa que na costura estamos sempre a aprender!

EN: The sleeve length was absolutely on point for me so in the end, the only alteration needed was lengthening the skirt portion of the coat. Ohh, I almost forgot: the pattern includes the flaps but it doesn't include pockets or pocket bags; I decided to add in-seam pockets along the front panel seam (right under the flaps, 12cm under the raised waistline), and for those I'll be using the T-coat pocket pattern. No need to reinvent the wheel, right?
---
PT: O comprimento das mangas estava no ponto, por isso a única alteração foi mesmo aumentar o comprimento da saia do casaco. Ahh, quase me esquecia: o molde vem com as paletas, mas não tem bolsos nem molde para funduras dos bolsos; optei por acrescentar bolsos metidos na costura do painel da frente (mesmo por baixo das paletas, 12cm abaixo da linha da cintura subida). Para os bolsos vou usar o molde do Abrigo-T: não há necessidade de inventar a roda, certo?
EN: Regarding the inner structure of the coat, after some testing I opted for hair canvas on the upper fronts and outer collar; the canvas was cut using the pattern pieces and no seam allowances except on the upper part of the armhole:
---
PT: Quanto à estrutura interna do casaco, depois de alguns testes optei por usar entretela de alfaiate na parte superior das frentes e gola exterior; a entretela foi cortada usando o molde, sem margens exceto na parte superior da cava:

EN: The back and skirt portions of the coat will be underlined with tightly woven cotton (the kind used to make bed sheets). The pattern stitching lines and relevant markings were transferred to the cotton using waxed tracing paper and a tracing wheel (pattern pinned to double-layer fabric, cut adding seam and hem allowances, place it on top of the waxed paper, transfer markings to the under layer, then un-pin paper pattern, pin the fabric again at the same places keeping both layers together, flip fabric to the other side and trace again following the waxed lines; the end result is two symmetrical pieces both accurately marked). The underlining pieces will be basted along seam lines to their fashion fabric counterparts and both layers treated as one throughout the construction of the coat. In fact, the underlining pieces may well be used as the pattern with seam and hem allowances included, to cut the fashion fabric.
---
PT: As costas e as partes da saia do casaco irão levar um forro de empastar de tecido de algodão (do tipo usado para fazer lençóis). As linhas de costura e todas as marcações do molde são transferidas para este "entre-forro" com papel encerado e uma recortilha (coloca-se o molde preso com alfinetes no tecido dobrado em dois como de costume, corta-se adicionando margens de costura e de bainhas, depois coloca-se as peças sobre o papel encerado e passa-se a recortilha seguindo as margens do molde, e em todas as marcações deste; retira-se o molde em papel, mas torna-se a colocar os alfinetes no mesmo sítio, prendendo as duas camadas de tecido. Vira-se ao contrário, com as marcas da cera para cima e passa-se a recortilha sobre estas marcas, marcando assim a outra camada de tecido que agora está em baixo, sobre a cera. Obtêm-se duas peças simétricas marcadas com bastante exatidão). Estas partes em tecido de algodão serão alinhavadas às suas equivalentes em tecido do casaco ao longo das linhas de costura. Dá trabalho, mas depois até podem usar estas peças do entre-forro como molde já com margens para cortar o tecido!

EN: For the lining I had to use some pattern manipulation tricks, excluding the width of the front facing and merging the center and side panels in a single front piece. I also used the bodice back piece as is, but cut it 3/4" away from the foldline (including the foldline), to create a back ease pleat. The skirt portion of the coat and the sleeves in lining were cut with 1" hem allowances (I used 2" hem allowances for the fashion fabric) to create a nice kick pleat along the hem when everything goes together. Lastly, the facings and inner collar will be cut from the thinner green fabric and fused with thin knit interfacing. I'm also considering this fabric for the inner flaps and tab (it's either that or lining), and for the welts of the middle front buttonhole. One last alteration: I will shift down the bottom buttonhole turning it into an in-seam, as is the buttonhole on the collar seam (in this case I will have to split the front facing in two to create a seam line along the waistline). I will have to reposition the middle buttonhole to make it even distance from these other two in-seam buttonholes.
Hopefully you guys didn't find this post too tedious; I tend to get rather technical and often get carried away... If you need a break from all this technicality, you can always hop over onto my personal style blog (click here) and see me wearing the finished red T-coat (scroll down for an appetizer)! Thank you all for reading!
---
PT: Quanto ao forro tive que usar algumas das minhas habilidades de manipulação de moldes para desenhar o molde, excluindo a largura das vistas e unindo as duas peças da frente para obter uma única peça(saia e parte superior separadas, só fundi as peças na horizontal). Para as costas do forro usei o molde do casaco mas cortei-o colocado a 2cm da dobra do forro, para criar uma prega na parte superior das costas. Para a saia e mangas, bastou acrescentar margens de bainha de 2,5cm (no tecido acrescentei bainhas de 5cm). Depois de forro aplicado, este excedente deve criar uma prega na bainha, sem que esta se veja do direito do casaco. Finalmente, cuanto às vistas e parte interior da gola, estas serão cortadas do tecido mais fino e reforçadas com entretela termo-colante de malha fina. Também estou a ponderar usar este tecido mais fino para o avesso das paletas e presilhas das mangas (será isso ou forro). Uma última alteração será descer um pouc a última casa de botão para esta coincidir com a costura da cintura, e neste caso a vista da frente será cortada em duas partes para coincidir com a costura da cintura do casaco e proporcionar a abertura da casa de botão também. Como é óbvio o botão/casa do meio terá de ser reposicionado para ficar equidistante dos outros dois botões.
Bem, espero que não tenham ficado intimidados com todos estes detalhes; tendo a entusiasmar-me e a conversa fica demasiado "técnica" para ser acessível. Se quiserem relaxar de todo este "tecnicismo", podem sempre dar uma espreitadela no meu blogue de estilo pessoal (clicar aqui) e verem-me a usar o Abrigo-T vermelho! Obrigada a todos por aparecerem!


7 comments:
It's going to be beautiful!
Your posts are always so interesting and informative, please keep on producing them.
Your coats are so beautifully made. The green wool and pattern are gorgeous.
I love how technical this post is! And thanks for sharing that technique on easing extra fullness into a sleeve - it's genius. :)
Also, as a fellow blogger I am 1000% impressed by your ability to write such a quality blog post in two languages. Amazing!
Obrigada por toda esta informação. Não sabia que também se podia embeber a parte de baixo da manga. Assim elas ficam muito melhor, de certeza. Eu também não gosto nada de ver o franzido na cabeça da manga.
Vai ser um belo casaco. A cor é linda. Gosto imenso de casacos de cores vivas e alegres no inverno; deixam-nos mais bem dispostas para enfrentar os rigores do inverno e transmitem essa boa disposição a quem nos vê. Pelo menos é isso que eu sinto.
I love the details you give :-) So interesting to read about extra ease at the bottom of a sleeve, never heard of that before.
What a stunning pattern in an eye-catching colour, look forward to following along as always. Your outerwear collection must be quite something by now.
Post a Comment