
EN Summary: The first sewing project of 2017 is a red coat, and I’m revisiting a pattern that I’ve used before some years ago. On my first iteration with the pattern I used a speed tailoring approach, using fusible interfacings and it worked very well (read the sewing review here, scrolling down until reaching the English text); this time however, I’ll be using a vintage-mixed approach, similar to what Paco has done on one of his T-coats (here). Keep reading for this new coat's construction details.
---
PT Sumário: O primeiro projeto de 2017 é um casaco vermelho, revisitando um molde que usei há alguns anos. No primeiro Abrigo-T que fiz, usei uma abordagem contemporânea na confeção, exclusivamente com entretelas de colar a ferro e resultou lindamente (podem ler o artigo de costura aqui). Desta vez resolvi usar uma abordagem mista com métodos tradicionais, parecida com a usada pelo Paco num dos seus Abrigos-T (ver aqui). Continuem a ler para verem os detalhes da construção deste novo casaco.
EN: If you’ve read my 2016 “sewing year in review post” you may have noticed that I made a lot of summer garments, mostly casual dresses, and I covered a wide range of styles; I haven’t made any winter coats, one of my favorite garments to sew (in spite of having plenty in my sewing wish list). The truth is last year we had a mild winter and long summer; the cold days didn’t start until December so I didn’t feel the urge for new coats. As the weather has shifted to colder temperatures, I want to make at least two new coats and the first one is a red T-coat (the pattern is available here), using this lovely lipstick red basketweave Italian wool that I got from GorgeousFabrics.com over a year ago. This fabric isn’t as dense/tightly woven as the turquoise boucle used on my previous T-coat so I underlined the entire coat with knit fusible using a technique often referred to as block fusing (click here for my tips on block fusing).
---
PT: Se leram o meu artigo “As costuras do ano 2016”, devem ter reparado que no total fiz muitos vestidos, na sua maioria práticos, e variei bastante os estilos; o que não houve foi casacos de Inverno, uma das peças que mais gosto de confecionar, mesmo apesar de ter uma série deles planeados. É que o ano passado foi um pouco atípico em termos de clima, com um Inverno pouco intenso e um verão bastante comprido. Os casacos começaram a ser mais apelativos no final do ano, quando o tempo arrefeceu mais, e para já quero fazer pelo menos dois. O primeiro é um Abrigo-T (molde disponível aqui) em vermelho, usando esta lã Italiana com textura entrelaçada, que encomendei de GorgeousFabrics.com há mais de um ano. O tecido não é tão denso como o boucle turquesa que usei no meu primeiro Abrigo-T, por isso decidi adicionar um forro de empastar, neste caso entretela de malha de colar a ferro (técnica de “entretelar em bloco” a qual expliquei num artigo recente – clicar aqui).

EN: If you have never made a coat, the T-coat makes a great first project because it's so easy to sew and offers little fitting challenge. With this loose fitting coat the seams were reduced to a minimum, still incorporating some subtle shaping; the pockets are sewn in the side seams (one of the easiest pockets to construct using Paco’s tutorial – click here), there’s no buttonholes (instead you get slots in the existing seams) and the collar is also very simple, made of a single interfaced rectangle of fabric. The construction of the coat is also well documented on Paco’s blog (click here), using hair canvas along the front, and there’s also my old sewing review documenting the construction using just fusible interfacings (click here and scroll down for the English text). With this new red coat I followed the same construction order but previously block-fused every piece and reinforced most of the fronts with sew-in hair canvas, as Paco did. There’s no separate pattern for the sew-in canvas, but it’s easy to trace off by overlapping the front yoke pattern over the bottom front pattern at the stitching line, excluding the all-in-one facings, shaving off the hem allowances and the neckline seam allowance; we get a long front pattern piece that should be narrower than the entire front. I used soft hair canvas covering most of the front from the front edge to about 3-4 inches distance from the armhole/side seams. The canvas pieces should be prepared by stabilizing their front edges with beta tape (it’s basically a strip of fusible interfacing cut on the grain, used to prevent the front edges from stretching). So here’s the order of construction specifically for this red coat (remember to pre-treat the fabric/hair canvas by steam pressing and to press as you go):
---
PT: Se nunca costuraram um casaco, o Abrigo-T é um excelente primeiro projeto porque é muito fácil de coser e não precisa de grandes ajustes. Trata-se de um casaco amplo, onde as costuras foram reduzidas ao mínimo, mesmo assim incorporando uma forma subtil; os bolsos são metidos nas costuras laterais (um dos tipos de bolsos mais fáceis de confecionar e muito bem ilustrado pelo Paco – clicar aqui), não necessita de caseado (as casas são simples aberturas nas costuras) e a gola é um simples retângulo reforçado com entretela. A confeção deste casaco está também bem documentada no blogue do Paco (aqui), que usou entretela de crina para reforçar as frentes, e também por mim no artigo do casaco turquesa (aqui), onde mostro como se faz usando apenas entretelas de colar a ferro. Para este casaco vermelho estou a seguir uma ordem de construção semelhante à do turquesa, mas tal como o Paco, vou incorporar um reforço de entretela de crina nas frentes. O molde não vem com uma peça específica para este reforço, mas é muito fácil de a traçar sobrepondo o molde do encaixe superior da frente com a sua parte inferior, descontando as vistas, as margens de bainha e as margens de costura do decote; desenha-se uma peça única a todo o comprimento da frente, que vai desde a orla do meio da frente até cerca de 8-10cm da lateral/cavas. As partes cortadas em entretela de crina devem ser reforçadas ao longo da orla do meio da frente com uma fita termo-colante, que basicamente evita que as orlas do casaco esbijem com o uso e peso do casaco. A seguir têm a ordem de construção seguida especificamente para este casaco vermelho (lembrem-se de passar o tecido e a entretela de crina com bastante vapor antes de cortar para prevenir encolhimentos e também de irem assentando todas as costuras à medida que cosem):
1 – Cut all pieces with wider margins (mind the grain of the fabric), cut knit fusible interfacing with narrower margins, fuse interfacing to fabric’s wrong side, leave it to rest at least 4hrs before handling.
---
1 - (PT): Cortar todas as peças em tecido com margens adicionais às que já estão incluídas no molde, tendo em atenção o correr do fio do tecido; cortar a entretela de malha de colar a ferro com margens adicionais um pouco menores; colar a ferro a entretela ao avesso do tecido e deixar repousar pelo menos 4 horas.
2 – Cut block-fused pieces accurately, always minding the grain of the fabric; thread trace all relevant markings (center front, center edge separating the front facings, notches, hem-lines, in-seam pocket openings and buttonhole openings). Reinforce pocket openings and armholes with fusible stay-tape.
---
2 - (PT): Cortar cada peça entretelada com exatidão, seguindo as linhas de corte do molde (ter em atenção o correr do fio do tecido). Traçar com alinhavos todas as marcações necessárias (centro da frente, orla da frente que separa as vistas, nós de aposição, linhas de bainha, posição dos bolsos e das casas nas costuras); reforçar com fita de reforço termo-colante as cavas e aberturas dos bolsos metidos nas costuras.
3 – Cut lining using provided separate pattern pieces; the sleeve pattern includes cutting lines for the lining. If you alter the sleeve length as I did, these cutting lines must be moved accordingly.
---
3 - (PT): Cortar o forro usando as peças do molde específicas para o efeito; o molde da manga é a exceção, pois é o mesmo do tecido mas com linhas de corte específicas para o forro. Se alterarem o comprimento da manga em tecido como eu fiz, devem ajustar estas linhas de corte de acordo.
4 – Trace and cut the front canvas reinforcements on the straight grain of the hair canvas; reinforce front edges with fusible tape.
---
4 - (PT): Traçar e cortar os reforços em entretela de crina seguindo a direção do fio da entretela; reforçar as orlas das peças de entretela de crina com uma fita de entretela termo-colante.
5 – Sew center back seam; sew front yokes to front bottoms (leave the buttonhole slots open on the right front and facing); sew the shoulder seams closed; all these seams are pressed-open. Stay-stitch the neckline on the coat and facings on a single pass.
---
5 - (PT): Coser a costura do meio de trás; coser os encaixes superiores às frentes inferiores, deixando as aberturas para a casa na frente/vista direita; cerrar as costuras dos ombros; reforçar com um pesponto a linha de costura do decote no casaco e vistas, numa única passagem.
6 – Attach hair canvas to the front of the coat:
---
6 - (PT): Aplicar a entretela de crina às frentes do casaco

EN: Once again this step is considerably easier with this coat: simply place the canvas on top of the fronts and secure it in place with a few running stitches or pins; the front edge should align with the thread basted front edge, the bottom edge should meet the thread traced hemline; the neckline edge of the canvas should meet the fabric’s neckline stitching line and the canvas shoulder allowance should cover the pressed open shoulder seam. At this point you will observe that the front is indeed shaped; the yoke seam hides a bust dart on the side. The canvas should be slashed and overlapped to incorporate this shaping. Then the canvas should be catch-stitched (herringbone stitched) along the shoulders, neckline, front edges and hemline; the canvas can also be anchored to the front along the yoke seam. Also remember to deal with the buttonhole seam opening by cutting out a hole-opening on the right-front canvas; this opening should also be catch-stitched as shown:
---
PT: Uma vez mais, até este passo é consideravelmente simples neste casaco: basta alinhar a entretela sobre as frentes, fazendo coincidir a sua orla com a orla da frente marcada com alinhavos, a orla da bainha com a linha de bainha também marcada, a orla do decote com a linha de costura do decote do casaco; as margens dos ombros da entretela devem coincidir com as margens assentes abertas dos ombros do casaco. Neste ponto pode-se claramente observar que o casaco tem uma pinça de peito embutida na costura do encaixe da frente e é necessário fazer um corte na entretela e sobrepor as margens formando também uma pinça. A entretela de alfaiate deve ser então fixada no casaco com pontos cruzados nos ombros, na linha do decote, ao longo da orla da frente e linha da bainha; também se deve fixar a entretela à costura do encaixe, não esquecendo de cortar uma abertura no local da casa metida na frente direita, a qual deve também ser fixada com pontos cruzados, tal como se pode observar em seguida:
7 – Sew the sleeves to the armholes matching notches and press seams open (again very easy because this step is made on the flat with the side seams & sleeve seams still open and the sleeve cap ease is minimal, so no need to ease-stitch).
---
7 - (PT): Coser as mangas às cavas alinhando os nós de aposição e assentar as costuras abertas (uma vez mais é muito fácil neste casaco pois este passo é feito no plano com as costuras laterais do casaco e das mangas abertas e não é necessário embeber a cabeça das mangas).
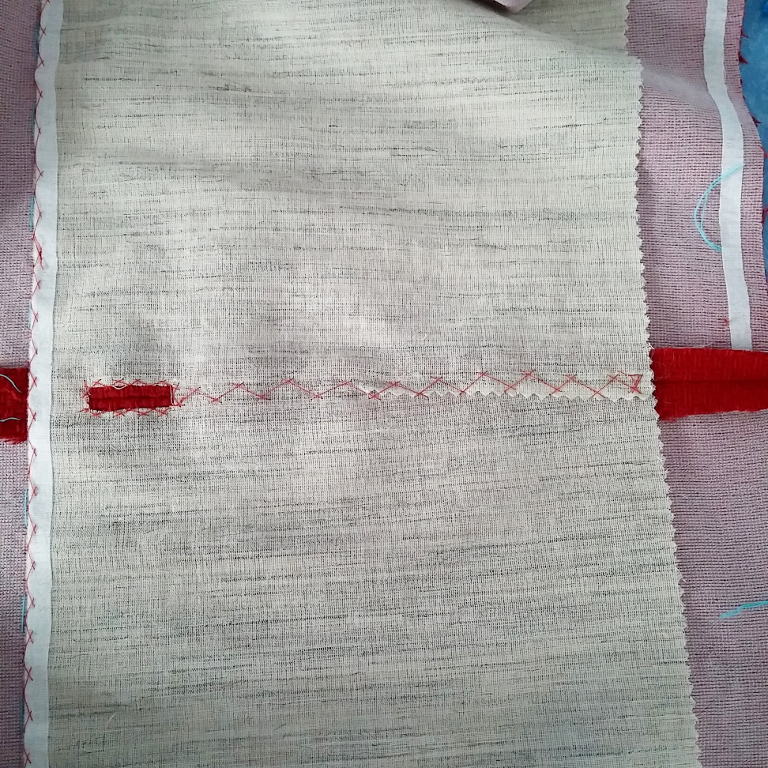
8 – The last reinforcement is catch-stitched to the hems; I wanted crisp hems so I decided to use sew-in wigan bias tape to add some structure (the wigan was sent to me by a good friend in NYC). The wigan must not cross the vertical seams, so each section is cut separately. There is another way to apply it by machine, directly on the seam allowances but I chose to stitch it the vintage way instead (click here for an article about using wigan on Fashion Incubator). Also note the grading and notching of the seams to reduce bulk:
---
8 - (PT): O último reforço que apliquei foi nas bainhas; queria que o casaco tivesse bainhas definidas e estruturadas, por isso usei fita wigan de coser própria (foi-me enviada dos Estados Unidos, cá nunca vi à venda), que é cosida com pontos cruzados sobre a orla da bainha (há uma forma alternativa de aplicar o wigan, cosido à máquina no suplemento de bainha, mas desta vez resolvi aplicá-lo "à antiga"). Podem também consultar um artigo em Fashion Incubator que explica o uso do wigan aqui. Basicamente é uma fita de tecido de algodão que parece levar goma e é cortada em viés para se adaptar às bainhas arredondadas mais facilmente. Não deve cruzar as costuras verticais (é cortada à medida de cada secção).

9 - Stitch sleeve seams and side seams; leave opening for the pockets; stitch close the pocket openings using long machine basting stitches (to be removed later when the pockets are done). Press all seams open.
---
9 - (PT): Coser as costuras das mangas e as costuras laterais, deixando a abertura para os bolsos; fechar esta abertura com pontos largos e soltos, que poderão ser removidos facilmente depois de terminados os bolsos. Assentar todas as costuras abertas.
10 – Construct the in-seam pockets and remove the basting stitches from the pocket openings (see Paco’s tutorial here).
---
10 - (PT): Confecionar os bolsos metidos nas costuras e remover os pontos soltos que as fecham (consultar o passo-a-passo do Paco aqui).
(To be continued --- Continua...)
EN: As a final note in this article I wanted to show you the button options that were considered for this coat; I started by planning to use self-fabric covered buttons but I wasn’t 100% satisfied with this textured fabric… Then I went to my favorite local vintage notions shop and found a couple of buttons which are perfect for this coat; they were the last ones of their kind and I considered it as a "heavenly sign" so I am going to use them instead of the fabric covered buttons:
---
PT: Como nota final neste artigo queria mostrar-vos as opções de botões para este casaco; comecei por considerar botões forrados com o próprio tecido, mas com a textura tão marcada não fiquei 100% satisfeita com esta solução. Depois passei numa retrosaria antiga aqui em Aveiro e achei estes botões com a cor perfeita, e já só restavam três (um dos quais estava um pouco estragado); considerei que foi uma espécie de “sinal divino” e trouxe-os comigo:

EN: Thank you all for visiting, and if you haven’t already, hop over to Tany et La Mode and see me wearing the complete V1527 set (click here)!
---
PT: Obrigada a todos por aparecerem e, caso não saibam, já me podem ver a usar o conjunto completo V1527 no Tany et La Mode (clicar aqui)!


3 comments:
This will be a wonderful coat. I slways love to see your process.
Thank you for such a wownderful post on your steps making this coat.
You always do such beautiful work!
Hi there
Always wonderful to see you in my inbox. Love drinking my morning coffee and reading through the technical details, which are so well written and illustrated.
This is going to be another stunning creation from you, using Paco's wonderful patterns.
Thank you so much for all the time and effort you put in to share and inspire us all.
Post a Comment